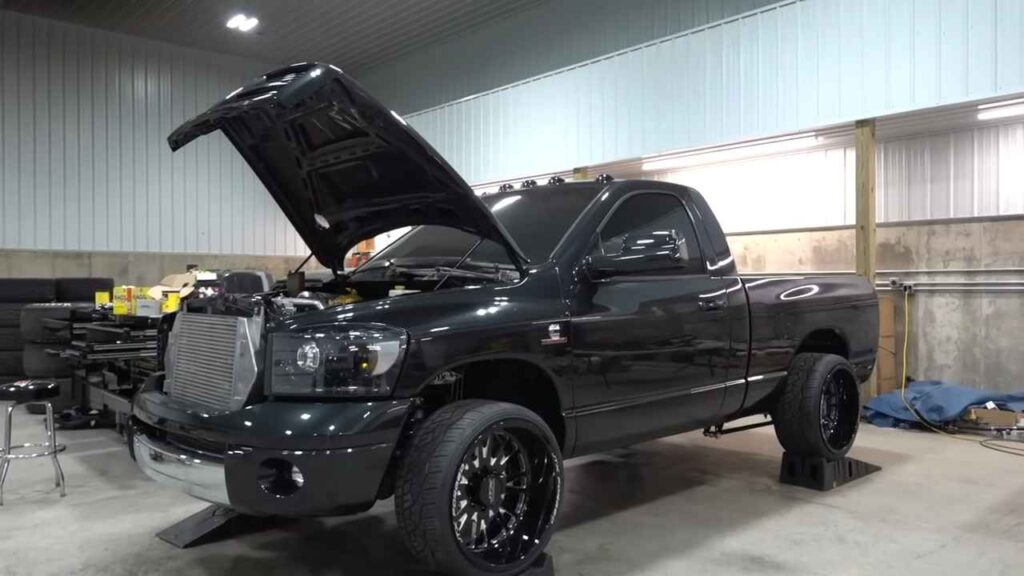
 What is going on my friends welcome back to another video in the shop with the shorty build if you’ve been following along. We have been working on this bad boy, getting it up and running, it’s not quite driving yet, but we are in Hot Pursuit of wrapping this project up, there’s still a lot of miscellaneous things that we need to do to this truck some stuff in the engine Bay, some suspension stuff, some drivetrain stuff, some wiring stuff, so my goal is to kind of take you guys with me. Through the entire progress. Show everything show all the little details.
We got a table full of parts that we still need to get to so we’re just going to dive in and just keep tackling the work until it’s done till it’s driving down the road till we’re having some fun with it. That is my goal before we get into that guys. Shameless plug of the video wrenchworks Giveaway number 15. Officially live every dollar that you spend on wrenchworks decom gets. You entered to win automatically this truck plus the 10 grand that it comes with.
I’M telling you guys this is my favorite truck that we have ever built here. It is so unique. It is so cool super stick, Billet G56 transmission. Does it get any better four-door long bed Prairie pearl paint like it is insane it’s so nice to drive. It’S got a bunch of power, the underneath the top to bottom. This truck is so sick and you guys are going to absolutely love it. It is going to one of you guys at the end of February, just by grabbing a new t-shirt, a new hat. It doesn’t matter anything on the website automatically gets you enter to win this truck. You can’t win if you don’t get entered, go to rwk.jpg engine bay first and we’ve got some sensors that we are going to be upgrading to make sure this thing is operating and running the best it possibly can.
So, let’s start with these two sensors right here. Well sensor and a relief valve so SNS diesel Motorsports we’ve got a upgraded rail pressure sensor, pretty self-explanatory you’re going to be able to let us read: uh precise rail pressure above our Factory sensor. So it is a upgraded sensor. That’S going to read higher than your factory rail pressure sensor. Next up pressure relief valve guys.
Do me a favor. Do not cap your relief valve? Don’T do it run an upgraded relief valve your injectors will. Thank you. This is going to kind of combo with this pair right here and if we’re going to run higher rail pressure, we need to have a relief valve that is going to allow us to do that and dump off pressure if we need to so they pair together. Reads: higher rail pressure relieves higher rail pressure if needed, highly recommend if you’re going to be bumping things up having some fun and getting the most out of your setup, so SNS diesel, the Motorsports taking care of that the GU over at Hardway performance. This is their upgraded 10 bar map sensor. So highly recommend this. I know a lot of you guys are running over Factory boost levels. What that sensor is going to do and it’s the sensor that is in your intake horn right here.
If I could see it there, it is right here can’t can’t do it with one hand. The sensor, that’s in your intake horn, that is going to read your Boost. The sensor from the guys over at Hardway is going to precisely measure boost and also temperature. So when you guys are pushing the limits you’re going to want to upgrade that sensor as well, so the guys over at Hardway have come out with that sensor for 67s and 59s highly recommend checking that out we’re going to be replacing that as well now. This does require uh some tweaking and the guys over at Hardway are going to kind of take care of that with this truck completely get their sensor running right and make sure that we can read high boost and also temperature in this sensor as well.
So this is a really really cool custom sensor. They just came out with go check them out, but again just want to make sure that the truck can run Peak Performance and uh. We can monitor everything and everything is in control, so very important kind of setup. Stuff for your truck, if you’re going to be pushing a little bit so we’re going to go ahead, replace those sensors. We need to go ahead and remove our intake horn and replace this sensor. Your relief valve is in the front part of this rail and your rail pressure sensor is in the back part of the rail. So I’m going to try and leave the rail in place and we’ll just go ahead and remove this bad boy out of the way and get that done, and then we can kind of get into the rest of. What’S on this table a whole bunch of goodies from the guys over at CJC off-road and Carly, steering stabilizer new front shocks, but take a look at these control arms – oh my goodness boys. So we got a lot of work to still do on this Beast uh. I’M not not quite happy with the way that it is sitting right now.
It just looks like it’s still very four-wheel. Drive- is, it still looks like it’s. It’S got a lift kit on it. We need to try and get this bad boy down a little bit more, so still a lot of work to do, but can’t do that if we’re talking so, let’s just get to work on this unit, all Right well, we’re all set with our sensor replacement. Like I mentioned before guys, the one in the front here got our intake horn off.
That is the pressure relief valve the one right in the front no way to get to that without taking the intake horn off. So pressure relief valve is in there and our new ra pressure sensor. All the way in the back of the fuel rail is in left the fuel rail in place. It’S kind of nice uh with it kind of fastened to the intake sh. If you can kind of get at it pretty easily the front one’s very easy, but it does allow it to kind of get torqued down nicely.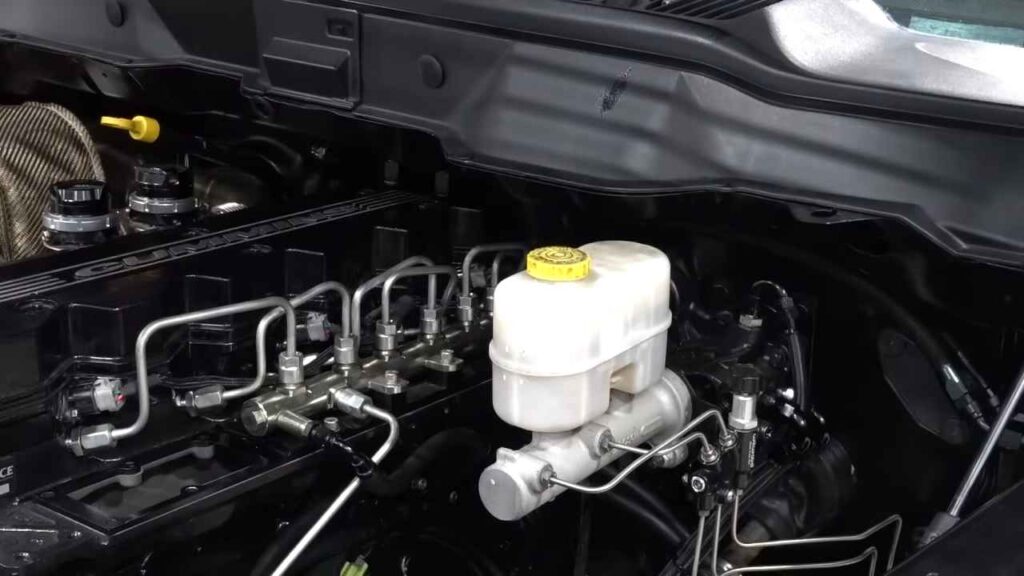 I would say that the back one as far as getting it torqued a spec uh, the kind of cheat code behind that is getting a torque wrench with a swivel head and you’ll, be able to do that much easier, so you can torque them in the truck Uh without taking the fuel rail completely out, so those are done and then also we have our new 10 bar map sensor again from the guys over at Hardway. Again, if you guys are running a build, that’s going to be running higher than Factory boost levels, and you want the best for your truck as far as performance goes getting the most out of it highly recommend you go ahead and pick one of these bad boys Up uh, it’s on their website, Hardway performance, uh and they have them for six sevs and 59s are inbound as well. So highly recommend that, if you’re serious about making some power anyway, anyway we’re going to go ahead and put the intake horn back on. And then we can move on to the next. We actually went ahead and kind of uh gotten some suspension stuff done, we’ll go over that, but going to go ahead button.
This back up and honestly, we are getting very, close. Well, my friends. We have a lot of catching up to do. We’Ve got a lot of parts here on the table that have come in for the shorty, build we’re actually a few days later than the work that we performed in the first half of this video. So I actually have to like kind of like catch up myself and catch you guys up as well.
Uh we have got our sensors in the engine. Those are complete. Those are done. We fire the truck up, make sure there’s no leaks as of right now, uh. We want to see what it does with some higher rail pressure as far as making sure all those uh sensors and everything are sealed up and good to go, got the suspension setup. Looking right on this thing, I trust me when I tell you uh, on this specific truck you’re we’re not going to go any lower without cutting a whole lot of stuff out of this thing, so it had firepunk lowering coils in it. I believe we took like a wrap in 3/4 off the bottom of those coils on top of them already being lower coils, so we’ve got our Carly control arms in and my goodness, if you guys see the look that we’re going for with the black and Machine Wheels with the control arms with the reservoir shocks here, you guys can see. That’S all mounted, that’s all done that is complete. You can see the amount of room that we really don’t have in between right here this this, this thing is pretty low. Uh.
Definitely would not recommend going this low on something that you’re going to drive quite frequently uh, but we’re willing to risk it for the biscuit on this, this toy project so to say, but um we are low, we’re all set there. We went ahead and dropped the rear down a little bit more uh really, I believe, they’re Factory length shocks in the back and I wanted to do reservoirs in the front to match and that’s why we kind of put the shock Towers back in uh shock Towers. Aren’T really my favorite thing in the world, but when you do delete plates and go this low, it’s such a short distance with the shock height that you’re, like I put the towers back in, so we get a shock that actually had some travel to it up And down so uh the reservoirs do that very, very well uh. We might actually upgrade to something even crazier down the road, but for now these look absolutely killer modified up some brackets, so the reservoirs kind of sit right there right in front of the tower. I’M really happy with the way that everything is coming together and looking.
We’Ve got it up on our Jacks because it’s way easier to work on some of the the wiring and the drive shaft stuff uh. So we’ve got a lot of parts. Let’S get into the parts before we just kind of keep knocking out work on this thing, um, that’s what we want to do we want to get to. We want to get to some more work on this bad boy. So there’s a couple.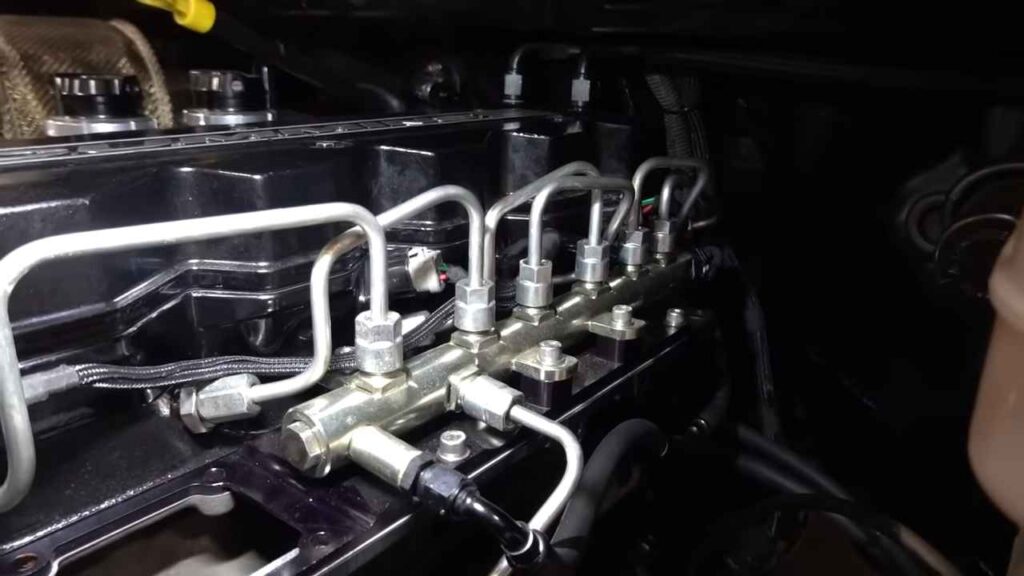 Miscellaneous paint match pieces that uh we’re still left on this truck. We went ahead and dropped those off to our man. Uh cam at knockout Customs he’s going to knock out that stuff again we’re in preparation to get this thing ready to party at uh lonar, throw down here in a few short weeks, if not less by the time. We have this video up, but anyway uh because we lowered the back so much as well. Our Calbert racing Cal track uh traction bar system uh, our bars that came with the kit uh, because they’re set up for something that’s a little bit higher were too long.
So we went ahead. We ordered some new bars if you guys run into that issue or anything similar uh. These guys are actually really really awesome. They have tons of different length, bars uh that will kind of accommodate for any changes that you’re doing if you’re running a cal track kit so went ahead and got a little bit. Shorter bars got an upper coolant pipe from the guys over at Joy, designs, uh.
As you can see, there’s actually two pipes in here so want to kind of give you guys a little heads up on something like this uh. If you guys have a flee coolant bypass that looks similar to this you’re going to want to remember that when you order an upper coolant pipe from a bunch of different guys that make these, because what you’ll end up with is a pipe. That kind of looks like this and it’s all tilted, angled down uh. This pipe was actually designed for a coolant neck without a riser plate in it, so it sits a little lower and it this pipe aligns a lot better. Now, seeing that we have that there we went ahead and got a pipe.
That’S got a Bend like this to kind of account for that. So we should be good with that. We’Re going to go ahead and install that so we’ve got cow, trck bars to install upper coolant, pipe stainless diesel intercooler Boots. These are nice. I like these because they are 4 in long as opposed to to a 3in, long boot uh.
These are super super heavy duty. These two boots right here are just kind of like really really old. I wanted to upgrade them new, get some new clamps just to make sure we don’t have any issues. These are nice heavy duty from the guys over at stainless diesel. The other side is all vanen clamp, so we don’t have to really worry about that.
So we’ve got some intercooler boots, not uh. We actually already installed this on this truck, but I will show you guys guys over at uh flying Diesel Performance. So what this is. This is a flexible engine, dipstick uh for your engine, oil and I’ve went ahead and already started to kind of install this. But your metal dipstick tube that kind of comes up top over here, just kind of a little bit of an eyesore uh.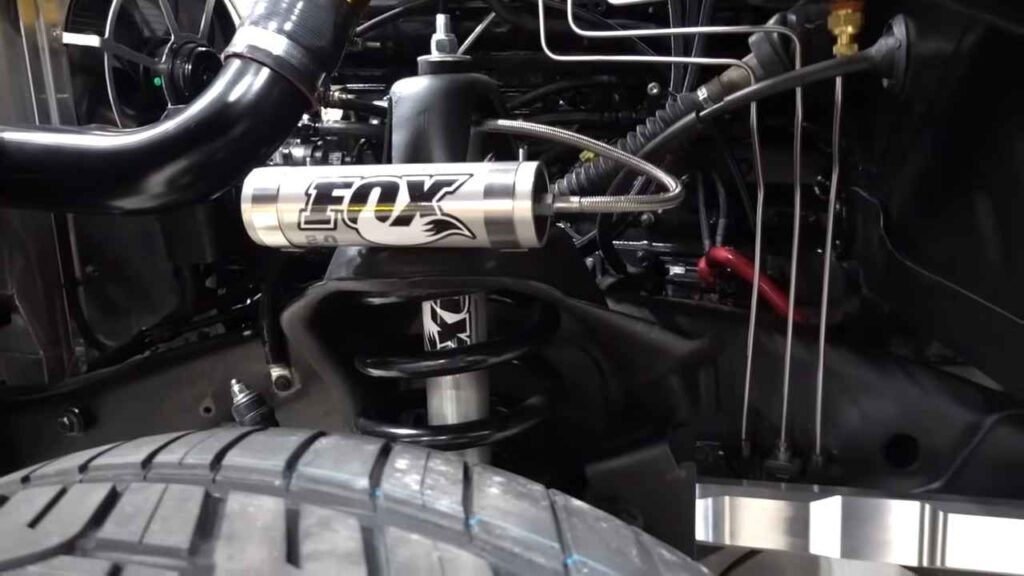 So we went ahead and got these. These are some really really nice like stainless braided. We can hide that really really nicely. That’S for the engine, oil and and they make uh ones for the transmission we’ve used, the ones for transmission as well on the 05 um. So this is a flexible locking dipstick for your engine, oil.
That’S a mouthful but uh, that’s from the guys over at flying Diesel Performance. You guys can go check them out. Shafts we’ve got our shaft man, we’ve got DNR Customs coming in clutch with front and rear drive shafts for the shorty. One of the main reasons why this entire truck came apart and uh forever ago was. We were fighting a like a drivetrain vibration.
Now we took the front drive shaft out on the way home of with even just picking this thing up. It got a way way way way way better. We still had a little bit in the rear, we’ve changed so much. I was like you know what let’s just get new drive: shafts uh Derek there and the guys there at DNR Customs, if you guys need drive shafts and you don’t have a local place uh that can accommodate like what these Dodge Ram trucks are. Those guys have shafts like in stock, nice front, drive, shafts uh and the rear drive shaft had to get made and I’m pretty sure they made it in like a day or two and two.
My door like within the same week so uh very easy to deal with get some measurements. He knows he’s very familiar with these Dodge Ram trucks. If you guys need drive, shafts highly highly highly recommend you don’t even waste your time with anybody else on drive shafts with these trucks, just call Derek call: The Shop call, DNR Customs get drive, shafts ordered he can get. He can. He can basically do anything cuz.
I’M pretty sure we’ve got like some some really cool uh, 5-in aluminum one for the rear and then a heavy duty, one for the front front, drive shafts these trucks transfer cases, I’m sure everybody has seen or know somebody. They are bad about front drive shaft. So I’m hoping that that that takes care of our uh drivetrain vibration issue, I’m hoping it’s not anything to do with the transfer case or further up the transmission or anything like that. But um we’ve got drive shafts to put in to make sure that we can kind of like go through the paces and and hopefully check that off the list. So we got those also what we’ve been lacking as well is.
We need a overflow for our coolant. Uh, this is from the guys over at motion raceworks and that’s actually that’s an extra dipstick tube for that truck and we’ve actually got an extra uh overflow for that truck as well. But the nice thing about these is actually they they label this being used for the transmission or coolant. But you can use this as an overflow or uh. You can kind of like pipe it in the bottom and you can use it as a reservoir uh.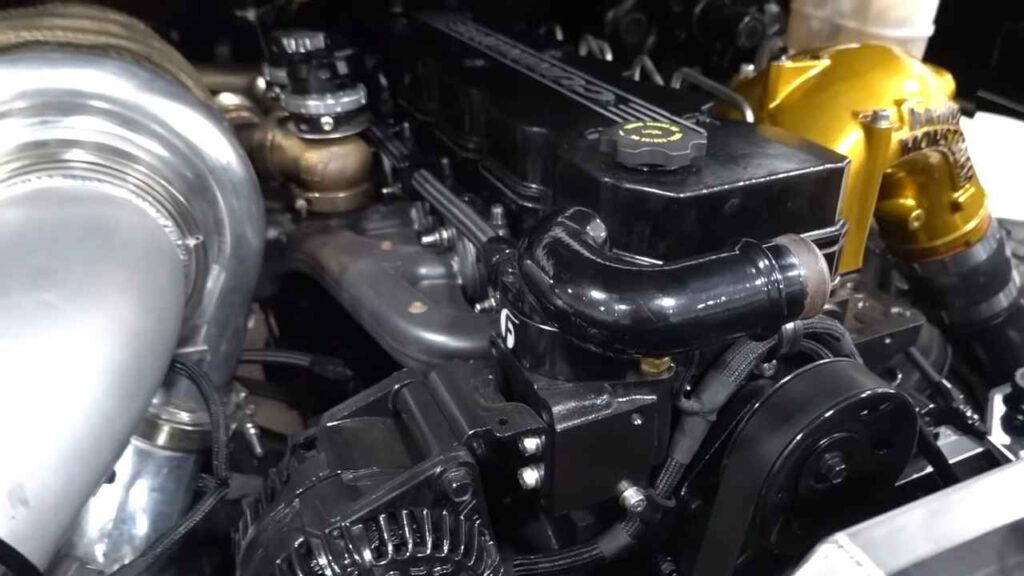 It’S got a couple different options and it should be really really versatile and it should work extremely well for what we’re doing and we’ll be able to run aend lines. They give you the uh npt thread, adapters and and all that stuff, so we’ll be able to kind of Mount that looks sleek. It’S nice, it’s Billet! It’S just it’s just really nice. Looking so we’ll go ahead and install that so yeah we’re closing in on a lot of progress on the shorty.
I know that was kind of long-, wited catchup, but hopefully that has some valuable information on where some of the parts are coming from. Why we deal with these people, how they’re applicable to this truck and and let’s just get rolling with the progress on getting this thing? done, all right so before we slap these uh beautiful shafts in the truck. I just felt like it was pretty necessary to show you guys what they looked like before. You can’t see them underneath that low thing so uh we called Derek up, and we told him what we were doing.
We measured how he wanted us to measure them. He gave us some options: uh he’s got plenty of different front drive, shaft options. I believe this is a 1410 joint unit. Uh super beefy. He even has them for uh, even stronger than that drag racing, sled pulling whole nine yards.
Uh kind of gave him some measurements on the rear. It’S actually it’s pretty funny how the front shaft on this on this truck is uh, maybe just as long or because of how short it is uh, it’s pretty funny, but anyway uh aluminum 5 in in the back uh. She is a unit and a half. Let me tell you what but uh we’re getting ready to put these things in, but I was like you know what uh you’re never going to see him again underneath that thing cuz, it’s so low, but uh new front drive, shaft new rear drive, shaft, and here We, go right guys, real quick before we close this video out. We are again a few days later after the last little bit of work that we did, but we’ve got our headlights wired up and my goodness they are absolutely insane.
They’Re not actually fitted up in there, because I’ve had the fenders off because I refused, after all of the work, hiding all the wires in this truck to not hide the wires for the headlights. So we actually ended up taking the fenders headlights completely out, because I hid all of the wiring right on the other side of that kind of like front main support there. So you can’t actually really see anything looking in here a lot of times when you get headlights and you got to mount boxes and stuff. We we Mount them here and stuff like that, which is great, but on this thing, went the extra mile hit all the wires extended everything. So you couldn’t really see anything, so we just have to kind of like remount, the fenders and the headlights, and then that will be done as well guys.
I promise you. This will be the last video on the shorty uh in the shop before we’re actually driving it. The next video I don’t care, we will be driving this truck. We will be using this truck. We are very, very, very close.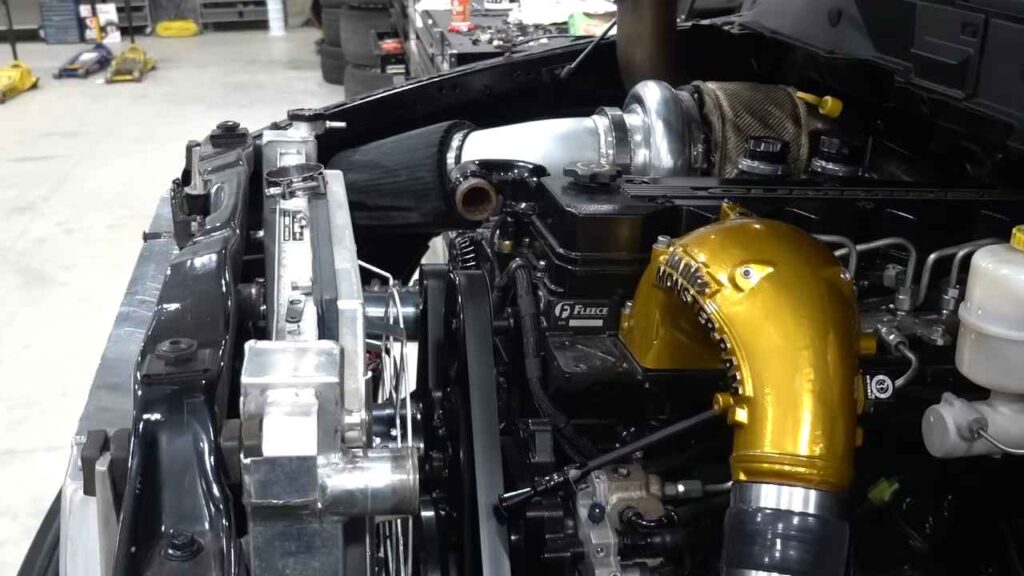 We’Ve gotten a lot of work done. Last thing before we go, we close this video guys out make sure you guys go to wrenchworks our latest giveaway truck, which is coming to a close at the end of this month. Make sure you guys go. Do that support your boy support the channel, we’ll see you guys in the next video very very soon see You.


